Get Hamon: Billy or Lisa Lisa
| Contact | Route and purpose |
|---|---|
 Billy | Hospital: interact to obtain Jonathan Hamon. See Billy’s location entry. |
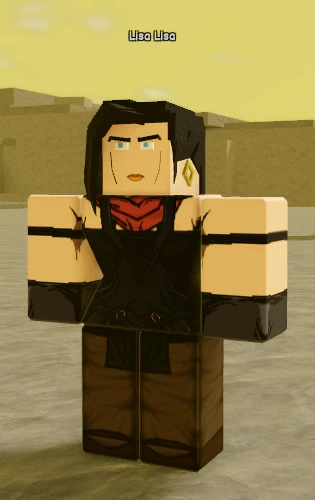 Lisa Lisa | Top of the Volcano: offers Hamon Training for 10,000 Coins, followed by path quests and path switching. See Lisa Lisa’s location entry. |
For Jonathan acquisition, start with the Hospital contact. Choose Lisa Lisa when you want the training and path progression below. Training is a prerequisite for her paths, rather than a universal requirement attached to Billy’s interaction.
Complete Lisa Lisa’s Hamon Training
Budget 10,000 Coins for Hamon Training. The Ripple Training Mask gives +3 Ability while equipped.

- Use the mask to breathe until the objective counter reaches 300. The card supplies a counter, without a time or breath unit.
- Climb to the top of the oil pillar once.
- Complete one bounty while wearing the mask.
- Complete one elimination while wearing the mask.
- Return to Lisa Lisa to finish Training.
Keep the mask equipped for the two combat objectives that name it. Reaching the breathing counter alone leaves the pillar, bounty, elimination and return objectives outstanding. The current Training card lists Jonathan Hamon as the completion reward.

Follow Jonathan Path after Training
Finish Training before taking Lisa Lisa’s Jonathan Path. Its checklist mixes object practice with a continuous movement objective, so separate the wine task from the water run:
- Break the rock under the frog five times.
- Equip and use the Glass once.
- Deal 500 damage while holding the wine.
- Run on water for 90 seconds without stopping.
The Glass instructions describe jabbing while the glass is raised, allowing a short rest, and using a heavy hit. Being knocked back spills the wine. Plan the damage objective around keeping the glass raised and avoiding knockback, rather than assuming ordinary damage without the wine advances it.
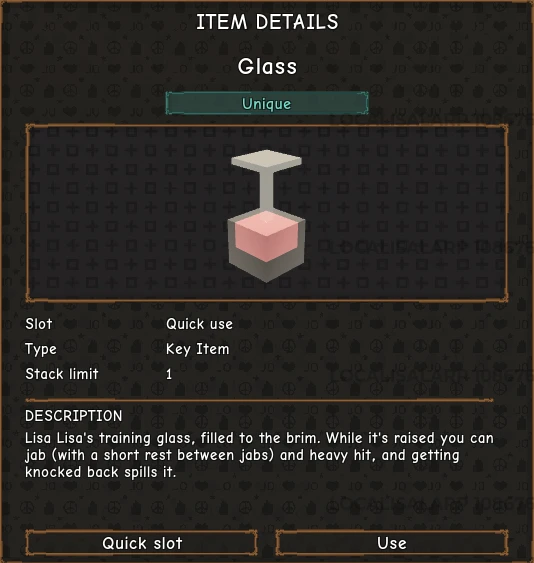
Lisa Lisa also offers Ceasar Path after Training: hold the Glass upside down once, swim through six buoys, hold the balance to 15, and defeat one Vampire. A boss, NPC or player counts for that last objective. The balance objective specifies no unit; keep its target separate from Jonathan’s timed water run.
Jonathan’s ordinary skills
Jonathan combines close-range attacks with Hamonic breathing. Cooldowns below are base values.
| Skill · base cooldown | Action and constraints |
|---|---|
| Sunlight Yellow Overdrive · 23s | A short preparation leads into repeated forward punches. Movement is slow and jumping is unavailable during the attack. Active punches provide armor and pressure a blocking target’s posture. |
| Scarlet Overdrive · 18s | A close uppercut ignites an unblocked target and launches them upward and forward. A block takes posture damage; a parry can answer the attack. Nearby gasoline can also ignite. |
| Zoom Punch · 12s | Targets the nearest enemy ahead within reach, with brief stun and knockback. It is blockable and parryable, cannot pass through walls, and costs 2 health without taking you below 1 health. |
| Hamonic Breath · 1s · key 6 | Builds the Hamonic resource for healing, longer dashes and infused light attacks. See breathing below for charge retention and interruption. |
Object infusion depends on who picks the object up. Character pickup applies Hamon; Stand pickup does not. Infused heavy objects and spears produce a ripple on landing, while gasoline transfers Hamon into its puddle. This gives thrown objects a separate role from the four ordinary moves.
Maintain Hamonic Breath
Use 6 for Hamonic Breath, the input explicitly identified by the Hamonic status card. While the status remains, it restores health, extends dashes and puts Hamon into light attacks. More charge improves healing and dash distance, so topping up serves both recovery and movement.
A full bar stays full for three seconds before it begins draining. Taking a hit interrupts breathing but preserves charge already accumulated. This makes interruption different from losing the resource outright: judge your next action using the charge that remains. Anti-healing effects still prevent healing; building Hamonic does not bypass them.
EX costs and restrictions
| EX · bars · base cooldown | Use and restrictions |
|---|---|
| Life-Giving Overdrive · 2 bars · 25s | Aim at a nearby growing crop. Growth runs at 60× speed for 10 seconds and stops when the crop becomes ready to harvest. |
| Sendo Ripple · 1 bar · 18s | Can activate while stunned and deflect thrown objects. Repeated hits build Ripple before the final knockback. Startup is twice as fast when you are not stunned. |
| Hamon Leap · 1 bar · 8s | Requires Hamon with no Stand equipped. Begin on the ground to cross a gap or approach a target. |
For a crop, choose a plant that is still growing: Life-Giving’s acceleration ends at harvest readiness rather than continuing for an extra growth cycle. The November 15 update separately adds healing and reviving people to Life-Giving Overdrive.
Next step: Billy’s Hermit Purple quest
Before removing a Stand, read Stand storage to preserve the loadout you want to keep. For Billy’s Hermit Purple quest at the Hospital, arrive with Jonathan Hamon and no Stand, defeat DIO once, and use Life-Giving Overdrive on plants 15 times. Follow the full Hermit Purple quest. Obtaining Jonathan from Billy and completing these Hermit Purple objectives are separate steps; talking to him alone does not grant Hermit Purple.
Switching paths and Sapphire Roka
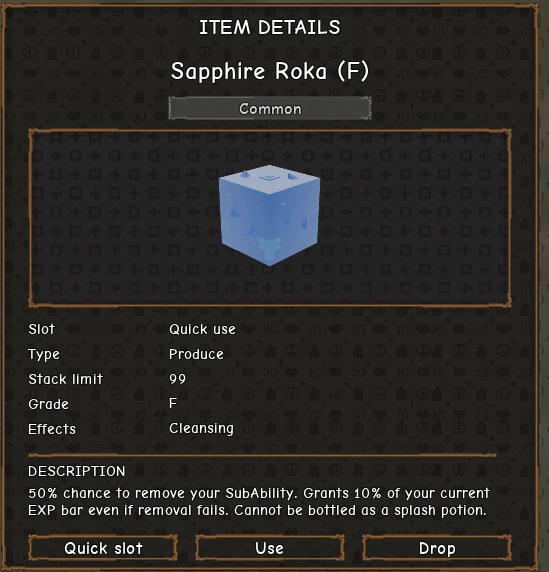
Lisa Lisa handles Hamon path switching. If your decision instead involves removing a Sub-Ability, Sapphire Roka has a 50% removal chance. It grants 10% of your current EXP bar even when removal fails. Sapphire Roka cannot be bottled as a splash potion.
Sources
Sources checked November 16, 2026. Clips illustrate the documented actions.